"not quilting"

Tag Collection Makers Panel Plus Free Craft and Play Apron Pattern

Tag Collection Makers Panel from Connecting Threads

It feels like all I am doing here lately is hustling. Buy my fabric! Look what I made that you can make too! I promise, I am more than that. There is creating for the sake of creating happening. Just not much to report on yet. In the meantime... look what I made that you can buy!

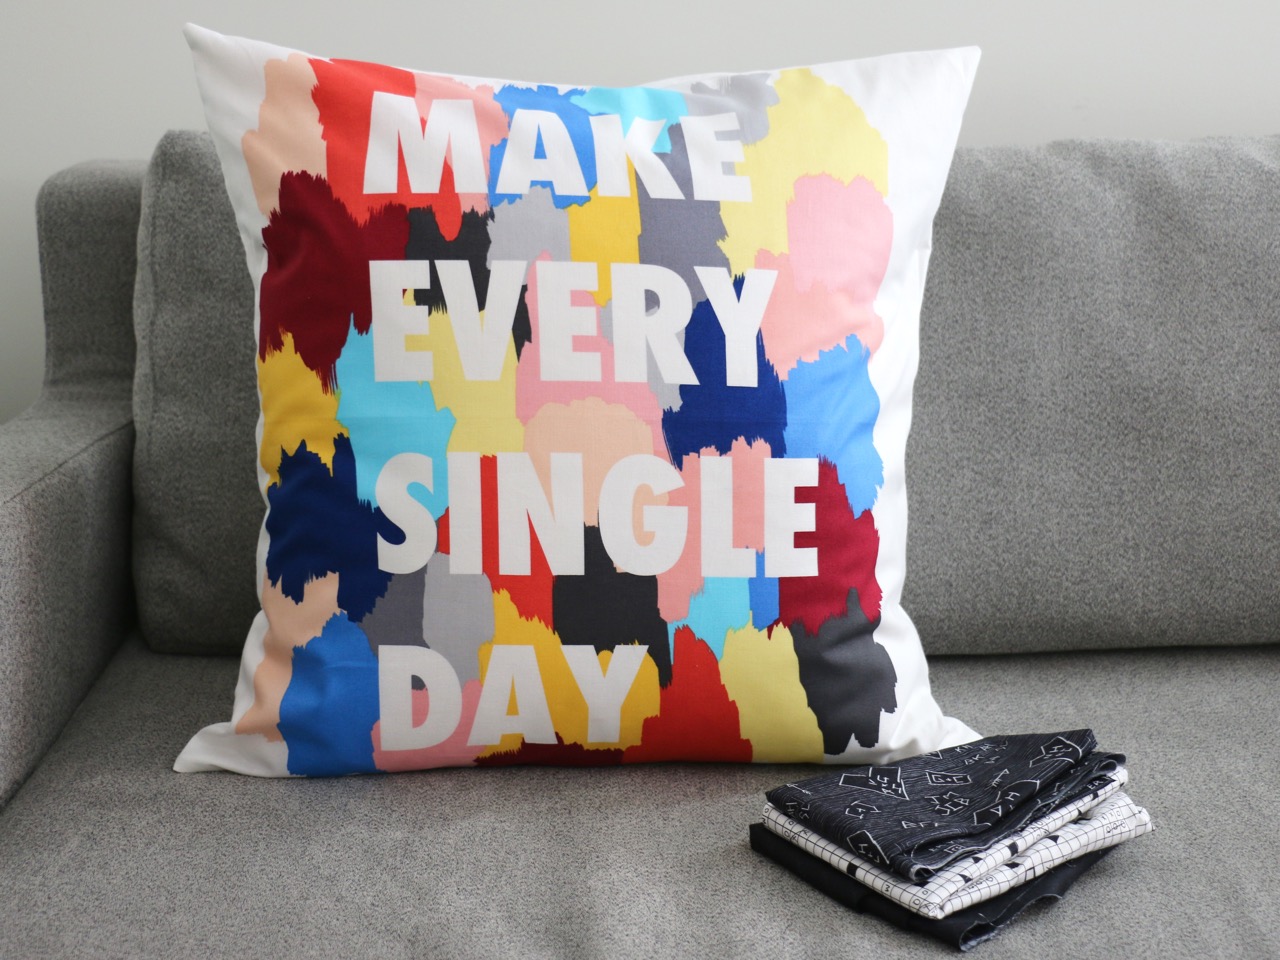
As a partner to my Tag fabric collection I created a couple of fun panels. These are actually the colours I'd intended for the entire collection, but we made the switch to black and white during the process. Despite that, this panel was still destined for printing. I am so happy about that.

The message on the big panel is open to interpretation.

Make, Every Single Day

Make Every Single Day... Count... Beautiful... Funny

Make. Every. Single. Day

Whatever you like, however you want to use it. The coloured section is almost 20'' square. I've made it a pillow here, I've sewn it into a quilt that I still need to share with you. It would make an excellent tote bag (on my list). But wait, there is more!

Makers Panel Tag Collection from Connecting Threads

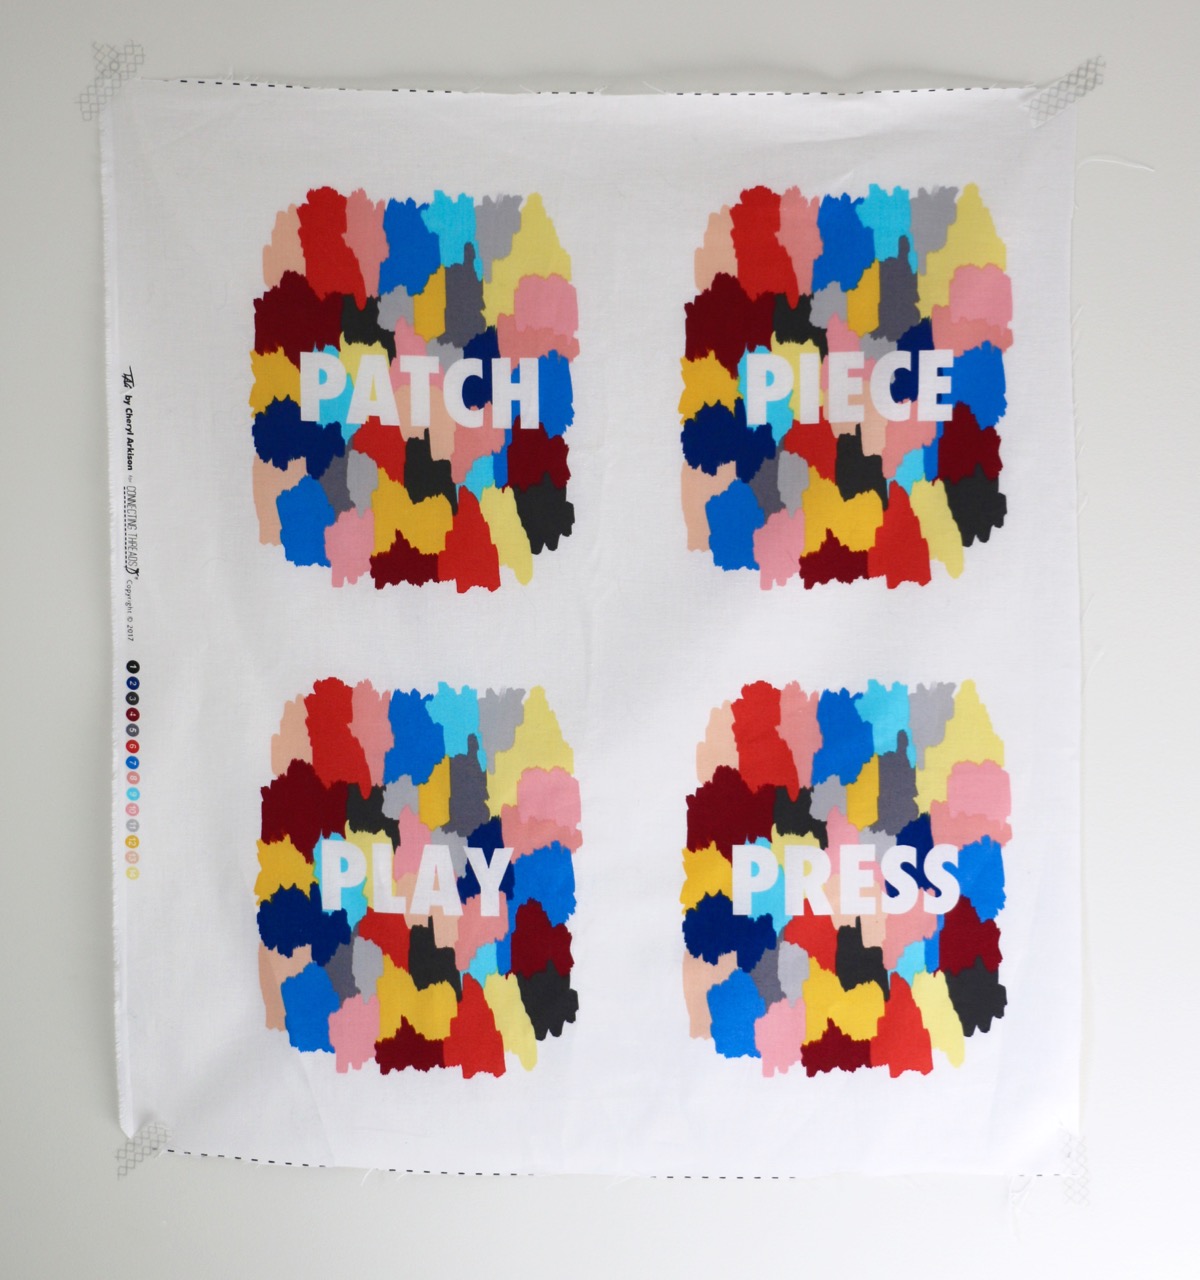
This is the rest of the panel. Four smaller versions with some fundamental quilting terms and two of my favourites - alliteration and Play! These panels come in close to 8'' square, bigger if you include some white space. I see these are small wrapped canvasses, the centers of improv log cabins, pockets... endless possibilities.

Speaking of pockets, I used a few of these on a new apron pattern. 

Craft and Play Apron

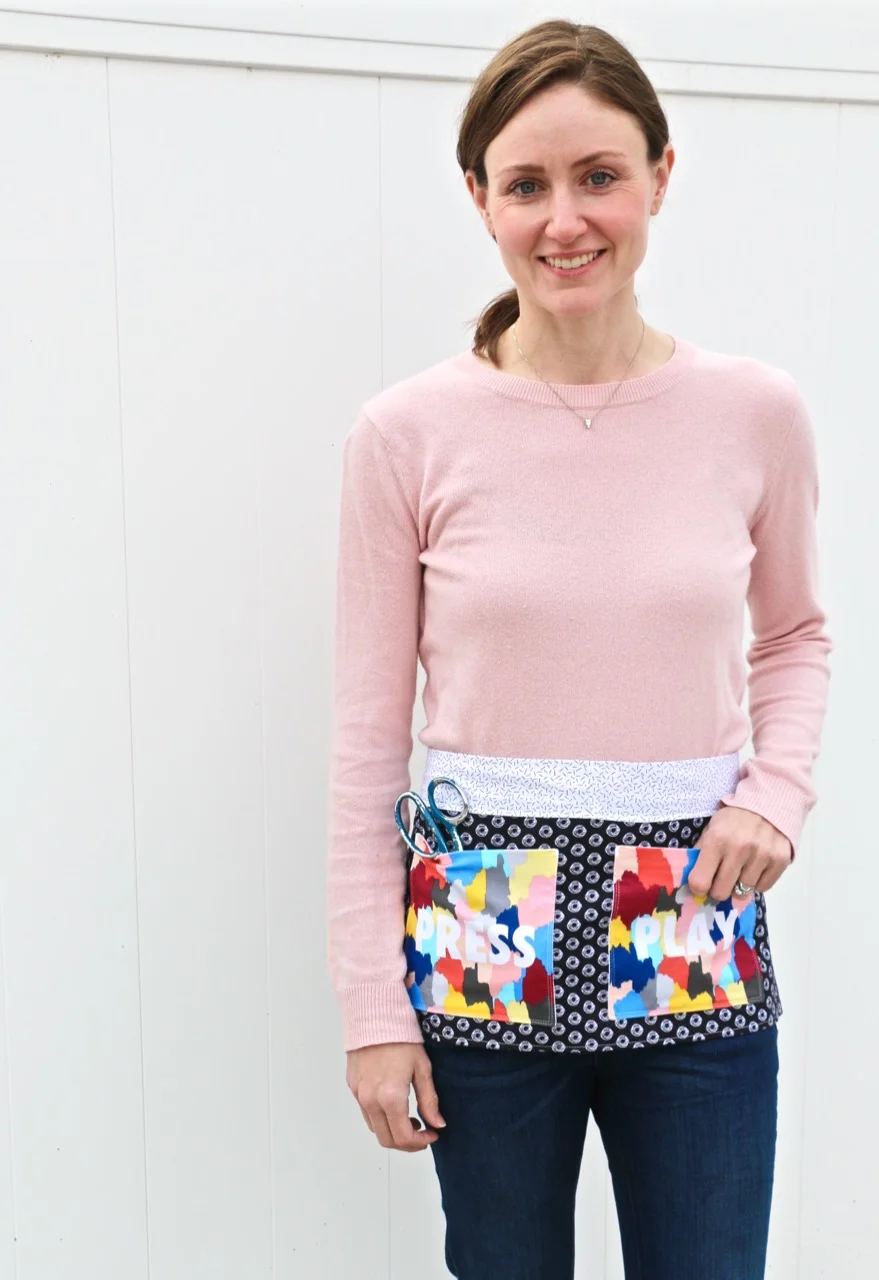
The pattern for the Craft and Play Apron is free! Something fun, super easy to make, and it takes advantage of those cool panels. But really, you could use any fabric you like. My beautiful friend G is modelling for me here, but I've been wearing my own apron while sewing. It keeps things rather close by. And for those of you that do craft shows, it would be perfect!

Download the pattern for free from Connecting Threads or Craftsy. Not everything is for sale. This is my treat for you!

A Year of Garment Sewing - 13 Things I've Learned.

This represents a year of garment sewing. (Minus one sweatshirt and two skirts hanging in other people's closets.) I am suitably impressed with myself.

A year ago I tried making a Linden sweatshirt, then another, and another. I made one more a few months ago. Two years ago I still would have said that I will never sew clothes. Now I have a collection of patterns in the To Make pile and I stash garment fabric. I hardly know myself!

Yet, I am so drawn to garment sewing. I know why, too. This has become my hobby. In order to avoid complete burnout with quilting being my career I needed another outlet. I'm not so keen on other crafts with a small house and limited time. Plus, I really, really like my sewing room. Sure, I could, and do, read in there. But sewing is what I really want to do. If quilting is just too much that day I pull out my tracing paper and already prewashed garment fabric. They are relatively quick finishes compared to quilts, another bonus. Finally, making a garment is a palette cleanser for me. A reward when I finish a quilt, a quick project between big quilts, something to take advantage of a clean cutting table before I mess it up again.

In this past year I've learned a few things about garment sewing.

  • When you are told to use a rayon or poly thread, use it. I had the quilting mindset and was all cotton all the way. But cotton thread has little give and ripped seams in my knits are the results. I've remade one sweatshirt and rehemmed a few others.
  • Make a muslin or test piece. It helps with fit and to work out any confusion that might come with construction. I've been making mine out of solid cottons when the pattern calls for a woven - they are generally cheaper and I can resuse them back for quilt scraps. I make wearables with the knits, knowing I can donate it if it doesn't work out for me.
  • Yet, there are times when you make something and it looks great, but it just isn't you. 
  • Adjusting a pattern isn't that big of a deal.
  • Spend the money on tracing paper. I always trace my patterns instead of cutting the original. It is easier to make changes and then make multiple sizes, if necessary. Like if your best friend asks really nicely for a sweatshirt.
  • Storing the patterns after tracing is a pain. So too when you print a PDF pattern. I've taken to saving paper towel and gift wrap tubes and storing patterns in those.
  • A serger would make my life so much easier, but I really don't know where I would put it. I might have to figure out that detail though.
  • Just because the pattern is popular doesn't mean it will be right for you, for your body. And that's totally okay. If you aren't sure, hit the mall and try on something in a similar style. Then determine if the style works and/or if you could adjust the pattern for yourself.
  • Voile, once washed and sewn in a garment does not drape as I expected.
  • It will almost always take longer than you thought it would.
  • Unless you have the most basic of sewing machines, there are a lot of stitches on your machine that are your friend. Discovering the blind hem stitch and how to use it was a game changer for me, for example.
  • Nearly every independent pattern I've used has extensive resources online. Maybe not from the designer themselves, but a google search will pull up blogs, reviews, and tutorials that can help you with your sewing.
  • Garment sewing is not nearly as scary as I remembered from my Home Ec days.

Here is what I have made this past year. When I hung them all together like this I was shocked. I didn't realize I had made this much!

There is a stack of fabric and patterns waiting for more of my time. I wish I could tackle the pants I want to make for the kids, the linen pants for me, a skirt out of Liberty, find the right pattern for the silk/cotton I recently picked up... The list goes on. And I'm pretty excited about that.

Arm Knitting Trial - A Pouf!

Back in January I found myself in Denver (more on that later). While there I got to finally meet Anne Weil from Flax and Twine.  We connected on-line years ago and have that sort of internet friendship that can do no wrong. So to meet and hug in person was such a delight. My last day in Denver Anne happened to be teaching an arm knitting class at Fancy Tiger. How could I resist?!

Arm knitting was surprisingly fun and easy. And this is coming from a non knitter. Anne explained everything so well, demonstrating the technique herself - have you ever tried to teach a class with your arms literally tied up? In the class we covered the basic technique, yarns to use, and knit up the foundation for a pouf. 

What's a pouf? Well, in my house it's become a footrest, a book rest, a toy, a dog hair catcher, a perch for small children, and a back roller. It's whatever you want it to be. Plus, it looks cool.

The most awesome thing about arm knitting is that the yarn is the only supply you need. Barring amputation you have everything else you need.

I made mine out of an orange Wool and the Gang wool. You use 4 skeins of the thick stuff, officially referred to as super bulky (200-250g). Orange, because well, orange! We cast on, made a gauge swatch, then frogged our swatch and started at the project. For a pouf you essentially make a blanket then cinch the ends through the casting on and off stitches. (are there more correct terms for that?) By the end of the class I had my blanket part down and went to the airport armed (ha!) with the instructions to finish the pouf. I hugged Anne goodbye and got out of Denver on Superbowl Sunday.

At home I filled an orange pillowcase with buckwheat hulls, sewed it shut, then cinched my pouf around it, tying it closed. Anne suggested using an old duvet or comforter, even something you find at the thrift store. I wanted something more substantial so it could be a footstool or perch for the kids, hence the strange purchase of 35 pounds of buckwheat hulls (for multiple projects).

Anne literally wrote the book on arm knitting. Knitting Without Needles is a beautiful and fascinating book. It covers both finger and arm knitting - only used your fingers, hands, and arms. And it is so much more than scarves! Despite the freakish amount of quilts in this house and a treasured crochet blanket from a friend I think I want to try my hand at a cozy blanket next, but the pillows and the tote... The book, and Anne, are gorgeous and inspirational.

Denver was a lucky trip. On my way home from QuiltCon judging I fit in an Instructors' Summit with Craftsy. (Anne is also a Craftsy Instructor so that's how we were able to meet.) It was great to get back to Craftsy to connect with staff there and other instructors. Filming my class and ongoing participation with students has been a tremendous experience. 

Now would be a good time to tell you about a promotion Craftsy has going on (seriously, like attending the Summit, this post is only about lucky timing.) For every class you sign up for until March 13 you are entered into a draw to win $1000 for your favourite craft based charity! If you've never signed up for a Craftsy class now is definitely a good time to do it. There are so many interesting and informative classes on Craftsy. Did you know they even have gardening classes? I just discovered that myself. I'm a huge fan of the cooking classes too and am learning photography skills. 

Full disclosure: there is a small incentive for instructors here. For every five NEW buyers I get $100 (That is people who've never purchased a Craftsy class before). That's not my concern though. What I do love is that if 50% of instructors drive at least 1 new buyer they will double the charitable donation.

To be entered in the draw for the donation you have to purchase classes through this link. Feel free to share.

Now, back to regularly scheduled crosswords with my feet up on my pouf.

Sewing Room Injuries


No, things have not been that stressful in life that I felt the need for drastic action. It sure looks like it though. I just accidentally touched my arm on the iron last week. This latest burn is healing nicely. It criss crosses a previous burn. And goes nicely with the other two scars on my arm from the same type of injury. Quilting is a dangerous activity!

It is dangerous indeed. We use sharp tools all the time. Hot tools too. All while creating something soft, cuddly, and beautiful. Here are some of my quilting injuries:

... Burns, as described above.
... Dropped a ruler and caught it with the top of my hand, where it landed on the corner and dented my hand nicely.
... Sewn my fingertip to appliqué (just a flesh wound, but a dramatic look).
... Sliced off the tip of pointer finger with the rotary cutter. Pay attention when cutting and don't look away because someone called your name from the top of the stairs. Or else you might almost require a skin graft, if it wasn't for having a brother who is a doctor who can bandage you up properly. And it is nice to be able to keep cutting and do simple things like flick on a light switch with that finger.

What about you? What are your sewing room injuries?