"Eats"

Carolling (Recipe: Peppermint Shortbread)


Two little girls, parents trailing behind, arms full of holiday baking, and lots of noise. Sorry, lots of singing. My girls took it upon themselves to go carolling to our neighbours last year. And while The Monster at one point this month suggested getting an iPod and just playing that as we walked instead, we are already planning this year's carolling.

Carolling means baking. Christmas usually means baking, but in our house it is the carolling that brings it on. If Christmas was my only reason to bake this Mama would eat nothing but cookies for a month. I wouldn't complain, but I think the doctor might have something to say about that. So, we plan the carolling and the baking hand in hand.

This year I've added two treats to the repertoire that have me wishing I could eat them all month long. This week I want to share with you this Peppermint Shortbread.

For most folks it doesn't feel like Christmas without shortbread. I am one of those people. In any form shortbread is a very good thing. While I do like the traditional Scottish Shortbread or my mom's light as air whipped shortbread, this is a great update. Just a subtle peppermint flavour to refresh the cookie and add to the Christmas spirit.

Peppermint Shortbread
Makes 16 bars or 32 cookies

1 cup butter
1 tsp pure peppermint extract
3/4 cup icing sugar
2 cups flour
1/2 tsp salt

Glaze
1/2 cup icing sugar
1 tbsp water or milk
1 candy cane, crushed

1. Preheat the oven to 350 degrees F. Butter or spray a 9’’ by 13’’ baking pan with non-stick spray.

2. Whip the butter with an electric mixer for 2-3 minutes until fluffy. Add the peppermint extract. Then gradually add the sugar and whip for 2 minutes more.

3. While the butter is whipping put the flour and salt in a separate, large bowl. Whisk gently a few times to incorporate the salt. Gradually add the flour until well incorporated. Pat all the dough into an even layer in the prepared pan. Pat down firmly.

4. Bake for 22-25 minutes until the edges are lightly golden. Let cool for 10 minutes then cut into 16 rectangles or 32 squares. If you don’t cut them while warm you won’t be able to cut them at all.

5. Once the cookies are cooled completely mix together the icing sugar and water/milk for the glaze. Stir until smooth. Drizzle over the cookies then sprinkle the crushed candy cane on top.

(recipe for Chai-Spice Pistachio Bark next week)

Thievery (Recipe: Cranberry Vanilla Muffins with Orange)

Lest you think I am the perfect sort of person I must confess: I'm a thief.

As a kid I stole something, a toy or a book or who knows what, from my neighbour. My parents found out, despite my denials. So my Dad drove me to the police station to turn me in. I confessed as we were pulling into the parking lot. Returns and apologies later I should have been cured.

Should have.


In University I worked part-time for a caterer. She had a spot in a fancy mall food court and mostly catered to hospital events. She was a very nice woman, good cook, horrible boss, and a bad business woman. She would literally do her grocery shopping from the kitchen where we worked. No inventory, no record of what she was taking. We staff initially felt bad that we were even taking home the food that was supposed to be trashed at the end of the day, but as her grocery shopping increased and her presence decreased we got cranky. Despite the fact that I was a poor student (woe is me) I never actually got my daily groceries there, but I ate well from leftovers. And I had a serious addiction to making hot chocolate with the couverture chocolate she bought by 10 kilo packs.

Then one day I crossed the line. It was a slow day and the two of us working started flipping through the cookbooks at the back of the kitchen. I can't remember the recipe that made me want to borrow the book, but that night I took one book home. And never brought it back. I worked there for many months more. At home I cooked from that book a few times, as much as my budget would allow.

That was over 15 years ago and I still cook from that book. Only now I don't feel guilty anymore. I'm a thief and I know it.


These muffins have been in my repertoire since the first winter with this book. I've made a few changes to the recipe over the years, but the spirit of Sarah Leah Chase's Cold Weather Cooking is still there. Definitely best the day they are made, better yet, still warm. They are closer to a cake than a muffin, a real treat.


Cranberry Vanilla Muffins (with orange)
(Adapted from Cold Weather Cooking)
Makes 12 muffins

1/2 vanilla bean
1 orange, zested
1 cup sugar
1/2 cup softened butter
2 eggs
2 cups flour
2 tsp baking powder
1/4 tsp salt
1/2 cup milk
2 cups fresh or frozen cranberries

Topping
1/2 tsp freshly ground nutmeg
1 tbsp sugar

1. Preheat the oven to 375 degrees. Line a 12 muffin tins with papers or spray with non-stick spray.

2. Chop the vanilla piece into smaller pieces. Combine with the sugar and orange zest in a blender or food processor. If you don't have a food processor you can substitute 1 cup sugar with vanilla sugar or sugar plus 2 tsp vanilla extract. Process until the vanilla bean is broken up and the sugar is fully flecked with those black seeds of the vanilla and the gold of the zest.

3. Cream together the sugar and butter until fluffy. Add the eggs, one at a time, beating well each time.

4. In a separate bowl whisk together the flour, baking powder, and salt. Add to the the creamed butter and sugar alternating with the milk. When the batter is smooth fold in the cranberries.

5. Pour into prepared muffin tins. Sprinkle with the nutmeg and sugar topping. Bake for 22-25 minutes, until a tester comes out clean.

On the Edge

This giveaway is now closed.

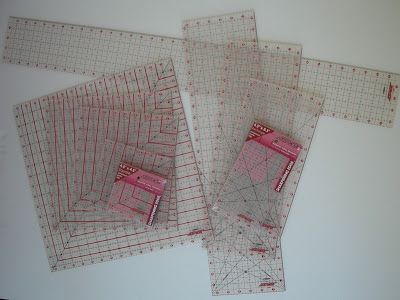
In more ways than one I'm living on the edge this week. I've had what one of you called a reset (love that term!) and have crashed head first into this week. Somewhere in between early mornings, late nights, preschool duties, deadlines, lessons, and single parenting I managed to test out Pat Sloan's new Cutting Edge Rulers.

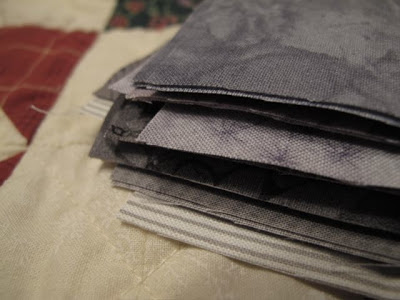
On what else, but some grey fabric? Yes, I say grey. At least consciously that's what I say and spell, but a look through my archives may reveal lapses in that intent.

I won't lie, these rulers take a bit of getting used to when you start. There is the noise as the rotary cutter blade moves along the carbon sharpening idea. Then there is the different markings. I'm so used to my yellow that the red and black lines were off-putting. But after a few dozen cuts it all made sense.

My only real complaints are that the labelling on the 6.5" by 24.5" ruler wasn't set up the way I normally use. That is, low to high out from one corner. But that might just be me. Oh, and the frosting for non-slip is awesome, but perhaps not well suited when you are cutting nothing but grey fabric!

Way to go Pat for bringing something new, but not too gadgety to the market. Want to win some? Stay tuned for the details.

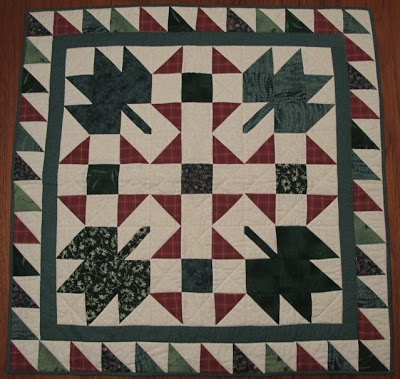
Pat didn't want a straight review of the rulers. No, not her! She never does anything by the rules anyway! So I'm happily sharing one of my first quilts, and a recipe. This week, it is all about Maple. And I don't mean my dog. (Yes, that is her name.)

This is actually my second quilt. (I have no photos of the first, a single Irish Chain made 12 years ago for my first nephew.) I made this quilt for my Mom. She was living in Texas at the time, so I wanted to give her something to remind her of Canada. And it currently sits in a box in my house, waiting a hanging sleeve. (Sorry Mom.)

I'll admit, I do cringe a little in looking at it. But it is still important to look back at where we came from and remind ourselves of the potential for where we can still go.

What I find interesting in looking at this was my move into a more scrappy look. That is, choosing to use multiple greens instead a single one. I guess I started that early in my career.

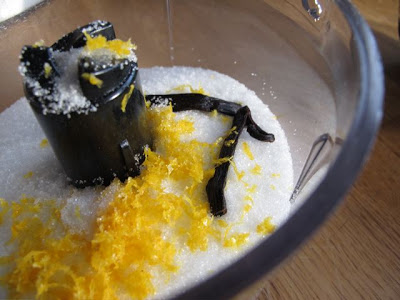
And on that theme of Maple, I thought I would share this recipe with you. After all, I'm also a food writer, I should be able to give you a recipe!

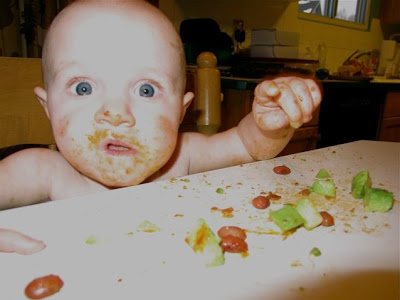
(Smilosaurus enjoying her beans last year)

Maple Baked Beans.

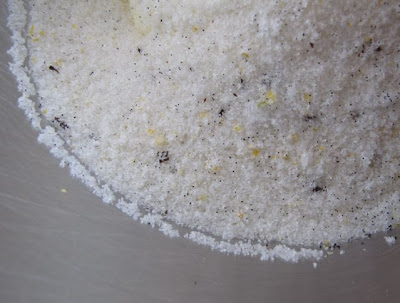
You would be hard pressed to find anyone who hasn’t cracked open a can of beans to eat along side a hot dog or roasted potatoes – at home or at the campfire. Walk away from the canned goods, making your own baked beans at home is really easy. Put all the ingredients in the oven to bake then hit the ice rink or toboggan hill. When you come home smell will beg you to tear into a loaf of crusty bread and curl up with a bowl of beans. There is nothing fancy to it. If you want to keep this vegetarian leave out the bacon and fry the onions in a touch of oil.

Makes approximately 4-5 cups

2 cups dried white or kidney beans* OR 2 19 ounce cans white or kidney beans, drained

6 slices bacon

1 small onion, finely chopped

1 small can of tomatoes paste

2 cups water, stock, or bean cooking liquid

¾ cup maple syrup

2 tablespoons Dijon or yellow mustard

*When using dried beans

1. Soak the beans overnight in water with a handful of salt.

2. Preheat oven to 300 degrees F.

3. Drain and rinse the beans well. Cover with fresh water by at least two inches. Add half an onion, peels on, and a couple of unpeeled cloves of garlic. On high heat bring to a boil in an oven proof pot or dutch oven.

4. Once the water is boiling, cover and place in oven to cook. Bake for 1.5-2 hours until beans are tender to the bite. Drain, reserving remaining cooking liquid.

For baked beans:

1. Preheat oven to 325° F.

2. Chop the bacon. Fry in a dutch oven or oven-proof dish, with a touch of oil to get it started. When the bacon is cooked but not crispy, add the onions. Cook until the onions are tender and transparent.

3. Add the remaining ingredients and stir well. Bake, covered for an hour. Season with salt and pepper.

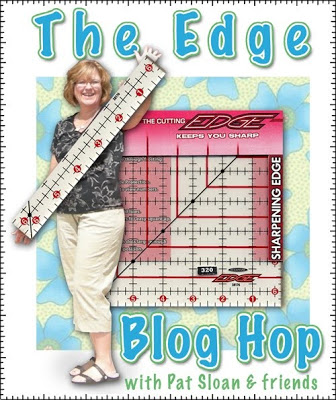
I mentioned the giveaway, right? Well, the kind folks at Sullivan's are offering an entire set of the Cutting Edge rulers for one lucky reader of the Blog Hop. You need to leave a comment at every spot on the hop. Here's the list, make sure you visit them all!

Pat Sloan

Kelly Jackson

Amy Ellis

Jackie Kunkel

Julie Herman

Amanda Jean Nyberg

Monica Solorio-Snow

Amy Lobsiger

Pam Vieira-McGinnis

Carrie Nelson

Polly Minick and Laurie Simpson

Michelle Foster

And Pat Sloan again!

And for one lucky reader here, I'm offering something totally not quilt related. But Pat asked us to share a recipe, so I thought a cookbook would be a good addition to the giveaway. I was thrilled to contribute to this cookbook - Blog Aid: Recipes for Haiti - along with a tremendous group of bloggers/writers/chefs. It was a fundraiser for the Red Cross and Doctors Without Borders in response to the earthquake in Haiti. Learn more about the project. And all commenters here are eligible to win their own copy!

This giveaway is now closed.

Pink

I'm not really sure how to explain it, but I'm kind of digging pink lately.  I find myself drawn to pink images, and especially pink fabric. Maybe because it feels indulgently girly? Or simply because it makes me smile.

Strawberry Sour Cream Ice Cream, courtesy of David Lebovitz. It tastes exactly like my summer berries and cream.

Binding one of the last doll quilts. Thrilled with that Amy Butler as a binding.

Hanging on to late summer evenings and celebrating Smilosaurus' new obsession with a pony tail (this is as good as that gets).

Baking pies with my girls, still in their PJs on a lazy weekend morning.

Experimenting with some new low volume ideas.

In love with my new, custom necklace from SuLu Designs. In love more that the girls notice it when I wear it and tell me how much they love it too.

And where do you see pink today?